In seemingly the middle of nowhere,
Adjoined to the small village of Branxton – is Flodden field. As a warmup walk to our intended double whammy for the day, I didn’t read much into it in our guide before rocking up. I was in for some sombreing education about it’s history.
Start/End
Monument
Boggy Ground
Scottish Lines
Route Details
2km (1 hour)
Map OS Landranger 74
Parking Free
With the modern-day Scottish border within spitting distance,
We arrived at the first of two free to use car parks and made a beeline for the obligatory information board.

Obligatory information board
It was here that we realised the gravity of the events that unfolded on this unsuspecting field several hundred years prior.
The 📄 Battle of Flodden Field saw anywhere between 17,000 and 25,000 die in the battle, most of which were Scots.
Today, its a completely unremarkable set of fields with a small stream running between. If not for the monument erected in the early 1900’s to honor the thousands of dead that lost their lives in one of England’s bloodiest battles.

En route to monument

On the right trail
As we exited the car park along the path towards the monument it was clear the dense, thick wheat was almost ready for harvest.
After attempting to fathom a joke about Weetabix and failing, we arrived at some steps and a wooden sign to confirm we were indeed headed in the right direction.
At the top of a short incline was the Flodden Monument, built in 1910, funded by public subscription after a fundraising campaign headed by members of the Berwickshire Naturalists Club.

Flodden Monument
It is a very simple monument overlooking the village of Branxton – devoid of the grandiose seen in most monuments seen today. The monument bears a plaque with a dedication ‘To the brave of both nations’.
As millenials, and far less brave than those soldiers, Rachael and I headed down the grass path towards the ‘Boggy Ground’ portion of the fields, which tactically was the undoing of the Scots in the battle of Flodden.

Charge!

On boggy ground
Once in the dip between the two fields, it was decidedly less boggy than described – modern drainage and the absence of armies trampling through it probably help here.
Taking a left to follow the marked Battlefield Trail sign once again, we hit the edge of the original field. This marked the central point of the Battle of Flodden field.

Towards Scottish lines
At this point, the trail takes a sharp right and up the incline of the opposing fields, towards where the Scottish lines were drawn during the battle.

Flodden Field selfie
After taking a quick Selfie to mark the halfway point of this very quick walk we headed past another field of gold which looked even more ripe for turning into Weetabix!

Fields of gold

Quiet contemplation

Return path
At the top of the field, where the Scottish Army set themselves for the battle is an unassuming bench – perfect for quiet contemplation.
After a small breather, we exited the field onto the road headed back into Branxton. Interestingly, across the road is the field where the English forces brought their flanking Archers which were critical to their overwhelming success.

Killing fields
As we headed down the road we saw the final information board of the trail – explaining in sobering detail just how much death, carnage and destruction happened.
The boggy ground apparently turned Red with the amount of blood being shed. 😐
After that bit of upbeat reading – we continued down the road into Branxton to have a little nosey at what was around before arriving back at the car park.

Welcome to Branxton

I can see the car!

Receiving the slain of both nations
Just before arriving back at the car, we noticed the small Parish Church – which we had not spotted when driving in. This church received the dead of both nations following the battle and it’s accompanied by two cemeteries which appear to serve the local community.
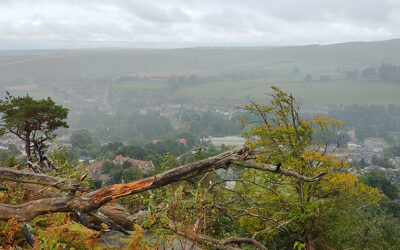
And on that note, I needed a sandwich to cheer myself up before driving out to our next destination of 📄 Humbleton Hill.
Comments
More Walks
Alnwick Tour
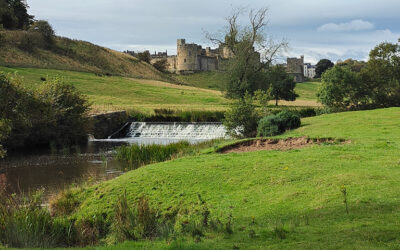
We decided to kill two birds and chalk off the Alnwick Tour during our child-free weekend.
Carriage Drive Trail
With a capable companion in my friend Shaun, we set off on one of the more challenging walks – Carriage Drive.
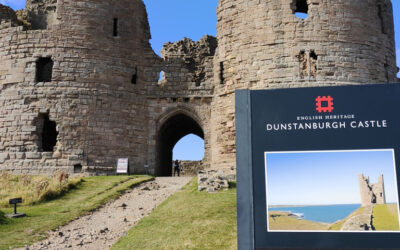
Dunstanburgh Castle Trail
In a rare child-free week, we decided to tackle one of the more distant and dangerous walks on the list: Dunstanburgh Castle.
Attractions
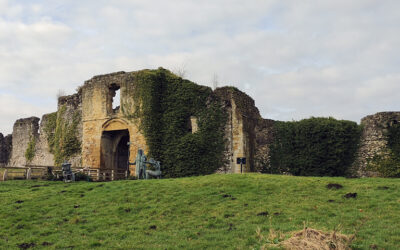
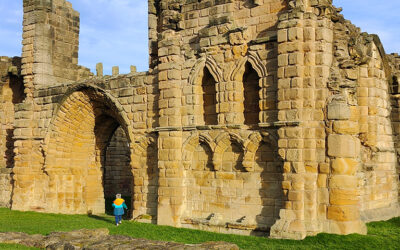
Helmsley Castle
Making the most of the emerging sunshine, we ventured an hour’s drive to Helmsley in North Yorkshire to visit its historic castle and medieval fortress.
Tynemouth Priory and Castle
On a bright but chilly day, we visited Tynemouth Priory and Castle, a historic site on England’s North East coast.
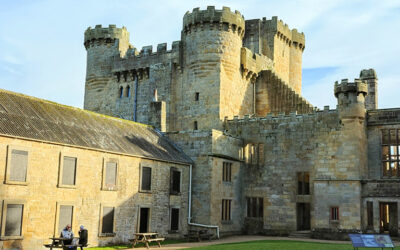
Belsay Hall
On a rare sunny but cold Autumn Sunday, we head to one on our hit list – Belsay Hall, Castle and Gardens in Northumberland.
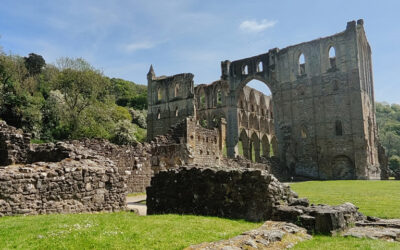
Rievaulx Abbey
After deciding to use Tesco clubcard vouchers to 3x value on an English Heritage membership – we headed out to Rievaulx Abbey.
Where should we go next?
If you have any suggestions or recommendations not in our current guide, we’d love to hear from you.
Thank you for the amazing journey, the pictures are beautiful.
Thanks for the informative guide, photos also lovely, I have sciatica currently so will be a mammouth walk for me but need to do it before we depart our beautiful bungalow in CornHill on tweed in 2 days time. Thanks again for taking the time to review!